A tutorial on go-rpi-rgb-led-matrix
Brief :
In this blog, we will be diving in an excellent github repo. Which allows us to control RGB LED display. I will explain, how to setup the environment and code on your machine. Basically, author provides binding that can be used seemlessly in python and C#. While, some others have used this API to create some other bindings like in go, nodejs, rust. In this tutorial, i will be using Go binding as an example.
Go binding dilemma ~
Yeah, now here. I’ve had my share bit of troubles using the go binding. It gave me plethora of pain. Somehow the suggested way to install it on a given system wasn’t working my way. AND, the repo is last updated 3 years ago. So i had my issues installing it. Fortunately, i found this repo forked and updated. So, i used this particular repo for my project. Forked and made changes.
It’s installation ~
Although, i am a big fan of go get <something> feature in go for any 3rd party package installation. In this case, i wasn’t. So, i simply cloned github repo in my go workspace.
Note : Cloning my look cumbersome errand to some but in my case, i wanted to make sure i can do some required changes. Having full control over the repo is the way how i go about.
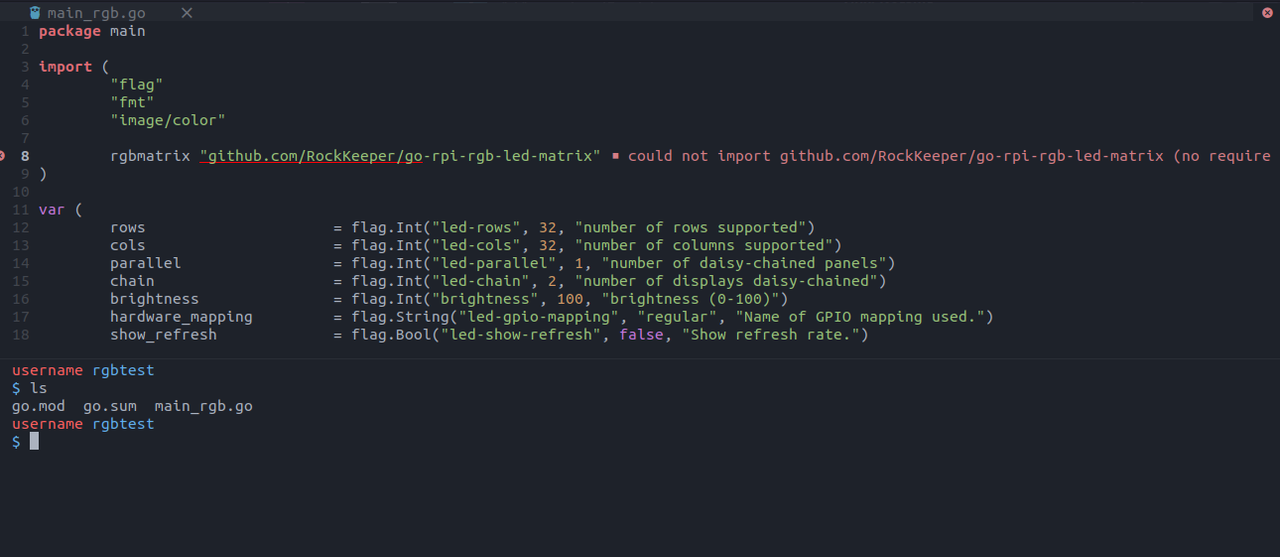
As you can see, in the workspace i have only go.mod, go.sum, and sample test go file. As my IDE says, it can’t find the repo. Coz, i have installed it yet. Let’s go through and do it :
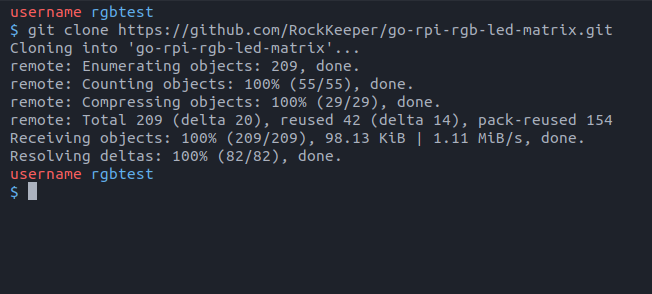
Cloning the repo :
So here’s how i cloned the repo ~
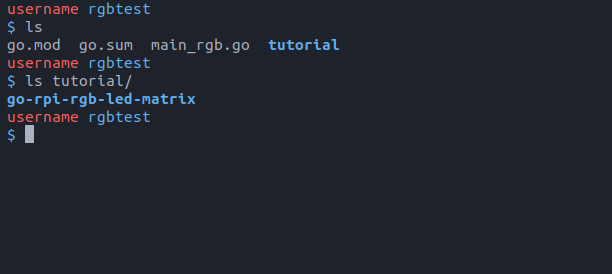
And further i create a directory called tutorial and put the cloned go-rpi-rgb-led-matrix into it. Here’s how it looks like :
Now after that, change go into the go-rpi-rgb-led-matrix & delete go.mod & go.sum files. Further edit matrix.go file. Find this snippet in the file where file import "C". Edit
From this :
import "C"
import (
	"fmt"
	"image/color"
	"os"
	"unsafe"

	"github.com/RockKeeper/go-rpi-rgb-led-matrix/emulator"
)
To this :
import "C"
import (
	"fmt"
	"image/color"
	"os"
	"unsafe"

	"rgbtest/tutorial/go-rpi-rgb-led-matrix/emulator"
)
make sure your root go.mod is rgbtest.
Now, cd into lib folder in go-rpi-rgb-led-matrix and run this,

git submodule update --initAnd after that, follow this! (i know too much steps but its worth it)
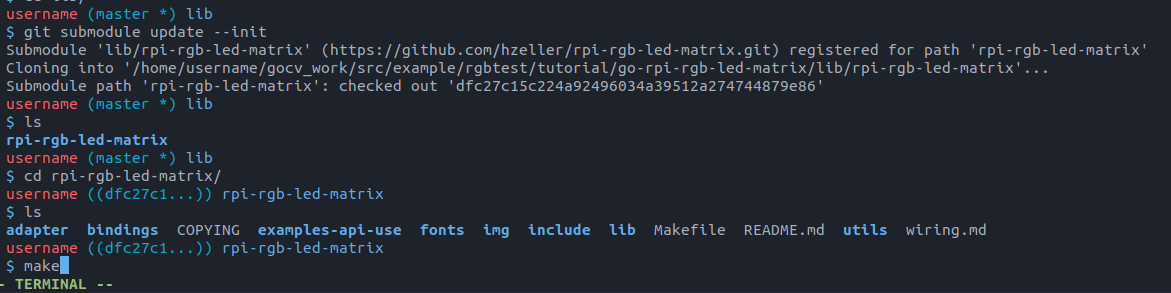
When you run make & something like this will go on:

Now finally all chaos done. When you go back and run the file [I HAD CHANED main_rgb.go to main.go to maintain consistency]:
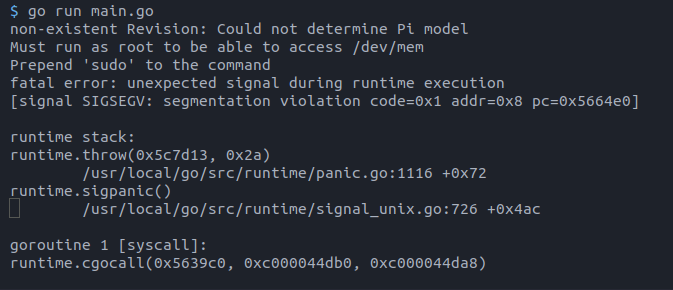
NO! after all this? Yeah. if you look carefully, you will see its saying something like
Climax ~
non-existent blah blah Could not determine Pi model
Yeah, if you run it on Raspberry Pi. It will work. But how to run it on PC?.
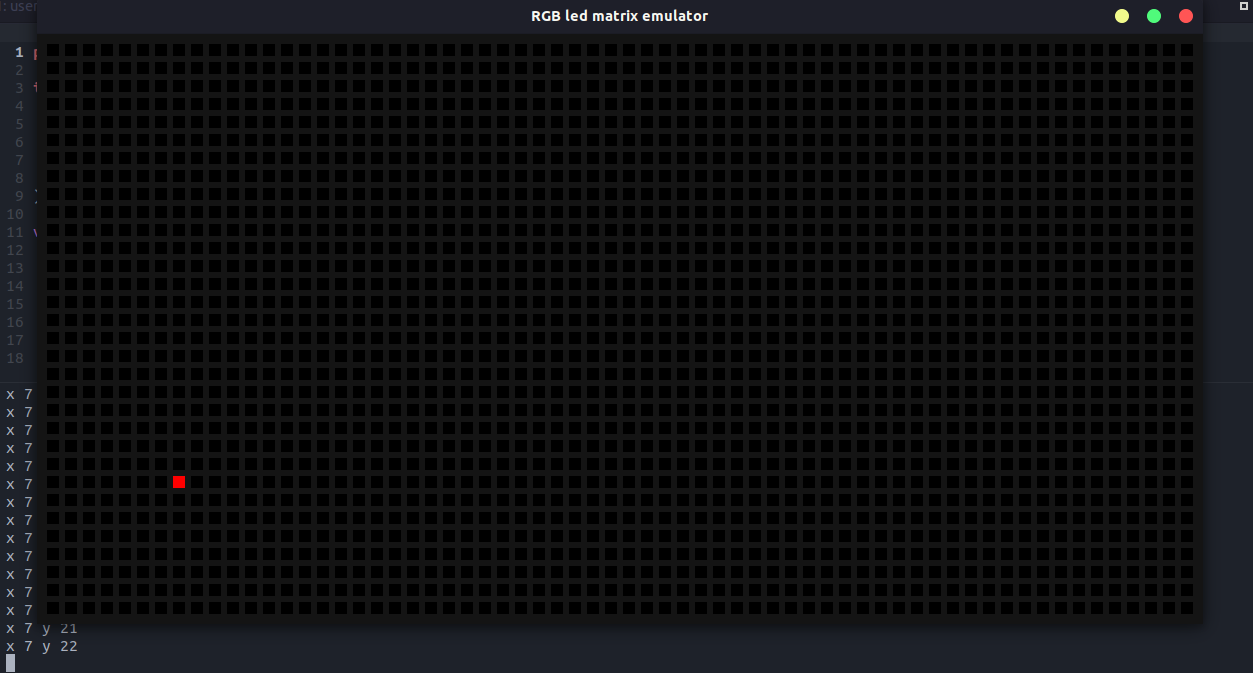
Well fortuantely, we have been provided with an emulator to solve our case.
According to docmentation :
As part of the library an small Matrix emulator is provided.
The emulator renderize a virtual RGB matrix on a window in your desktop, without needing a real
RGB matrix connected to your computer.

To execute the emulator set the MATRIX_EMULATOR environment variable to 1, then when NewRGBLedMatrix is used,
a emulator.
Emulator is returned instead of a interface the real board.
To do that, type:
export MATRIX_EMULATOR=1
and now if you run main.go.
Finally! After all this. Here’s my github repo incase you are interested in the code.
This cloning method and following stuff my look bad to some. But please note. I did this because it gives better control to library. I can edit whatever i want or create anything new depending upon the use case.
All done!
Next time with something new :)
Ciao